Learn how to share:
The Fiberarts Community is open and ready for you! Sign up for the Beyond the Skein newsletter to get all the details about our Grand Opening.
Check out tutorial #1 on the Fiberarts Community page—it’ll guide you into the space and show you how to navigate from room to room.
Let’s dive into using those cool tools I mentioned! By the end of this post, you’ll be able to Use the Circle Cam and the Presenter Cam. You’ll be sharing your screen, Google Docs,and files like a pro with your fellow Fiberartists.
How to Use Your Camera
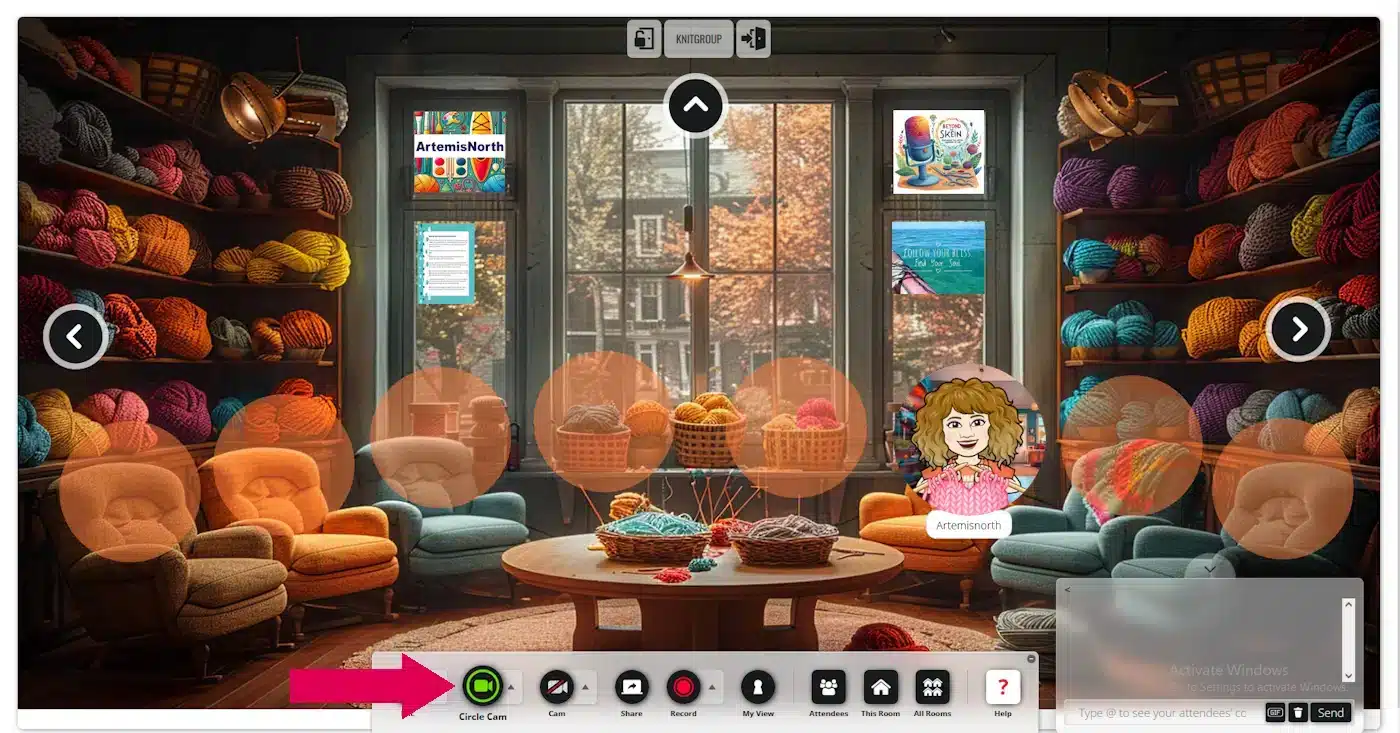
I’m really excited about the “Presentation Cam”! It’s such a useful tool. Recently, a friend and I used it in the Whisperspace to work out a new stitch together. It was fantastic—I could see her work and she could see mine, which helped us figure it out in no time! I think you’ll find this feature incredibly handy.
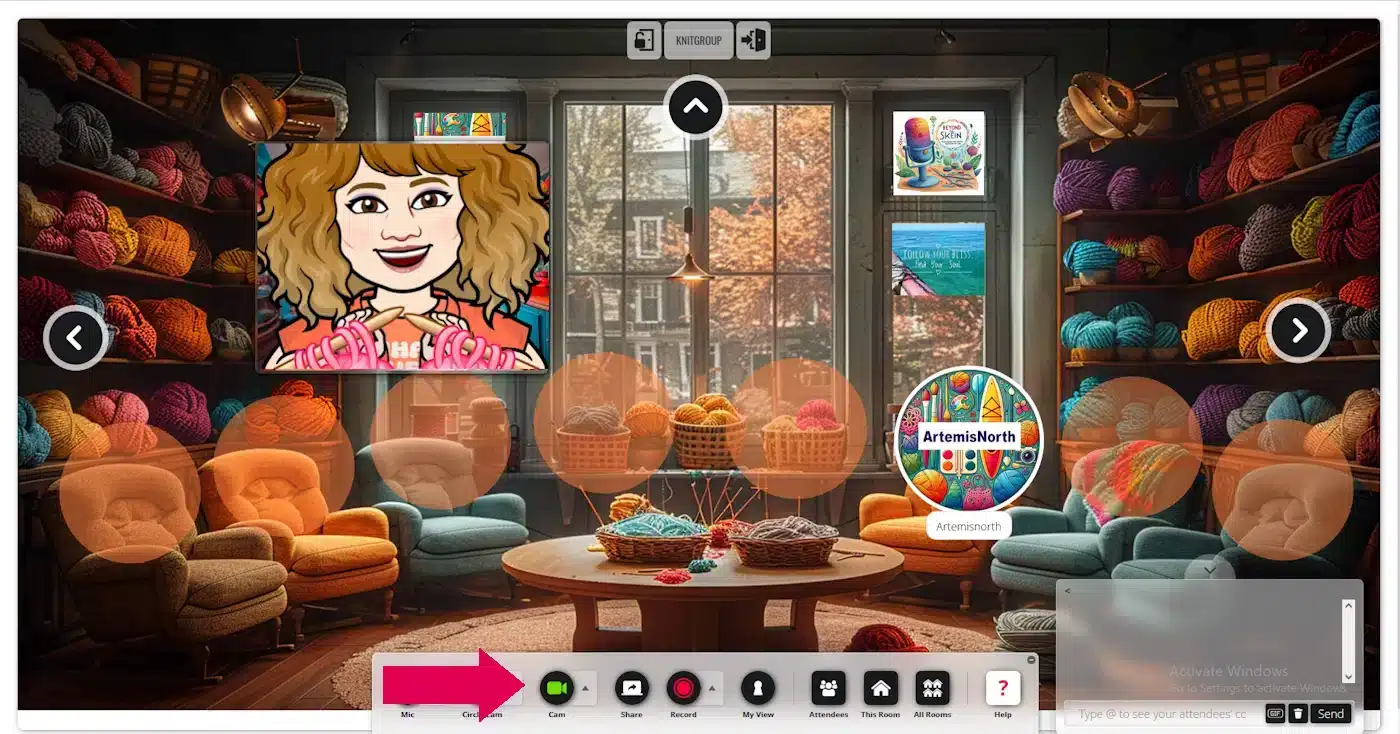
To deactivate the presenter cam, simply click on the “Cam” button once more.
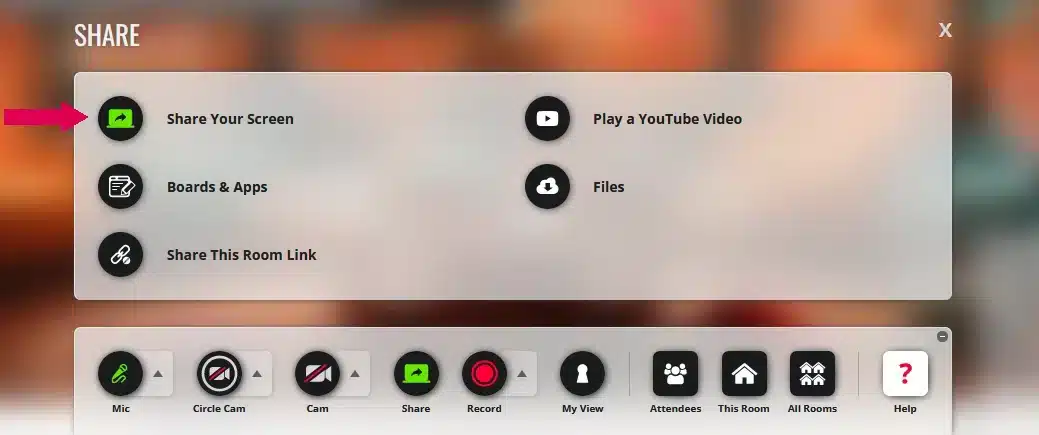
Please be aware: Your toolbar will have fewer items than mine, as I am the administrator.
Next, click on “Select window or screen.” A drop-down menu will appear, showing all the screens or apps available to you. For example, if you want to share a picture you’re working on in PaintShop Pro, just click on that option.
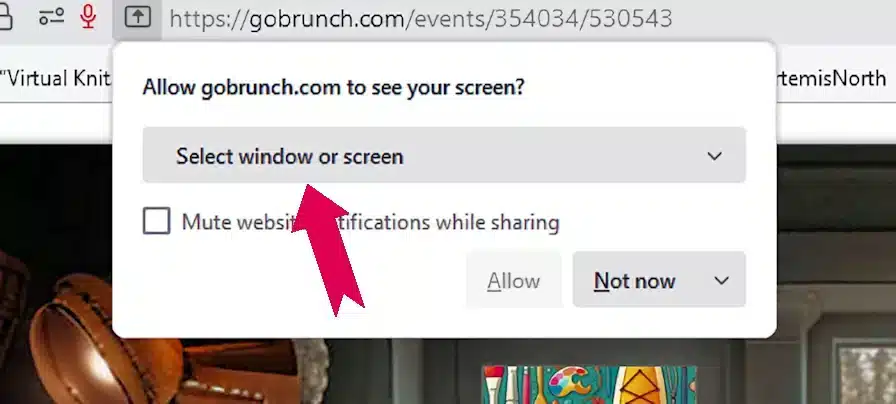
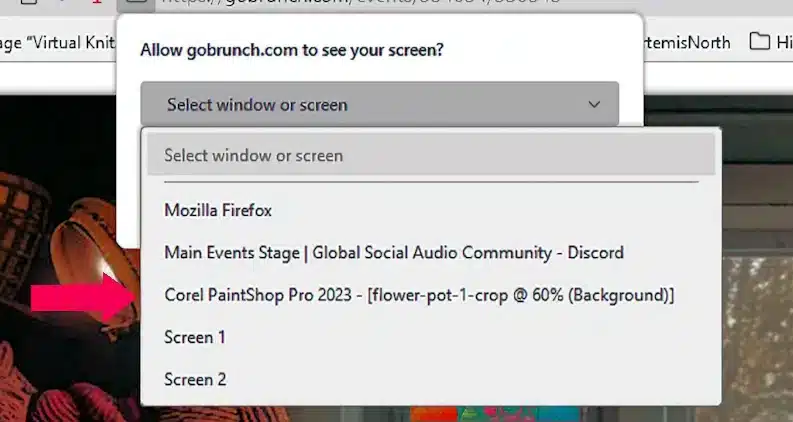
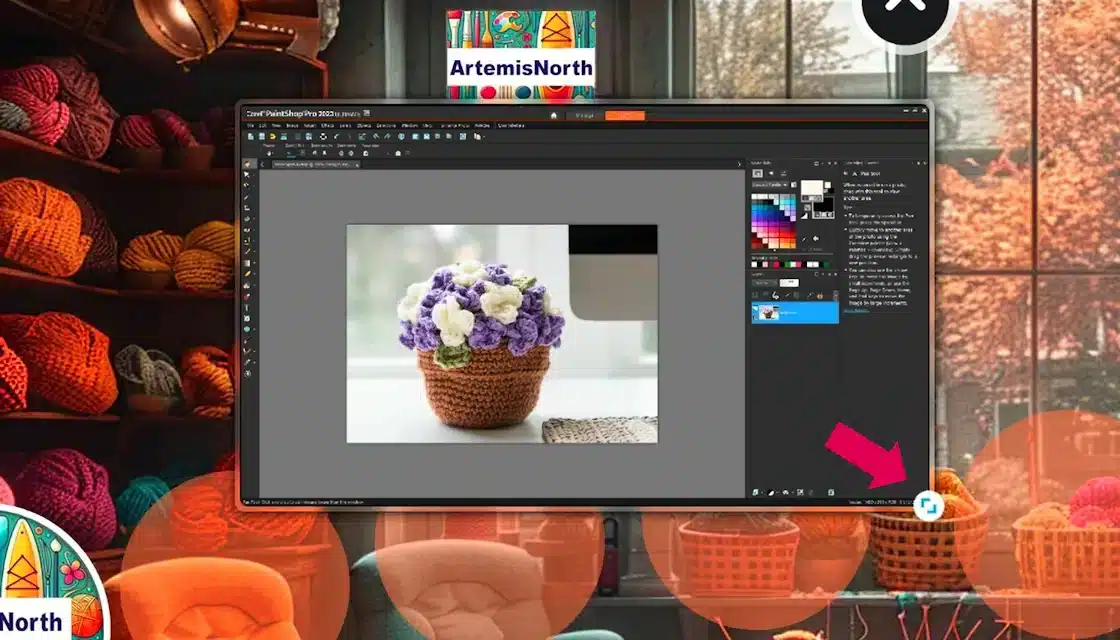
To stop sharing your screen, click the “Share” circle once more, and it will deactivate.
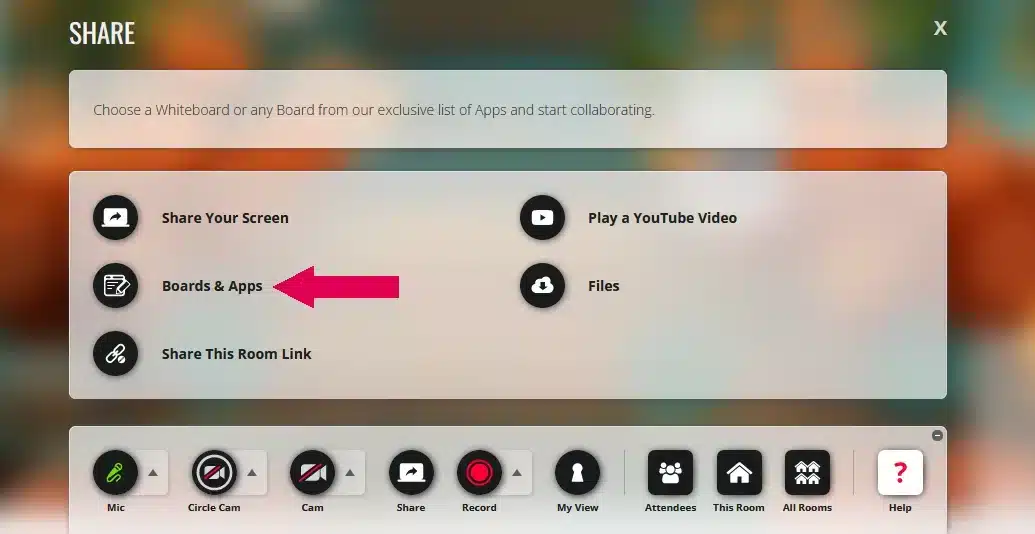
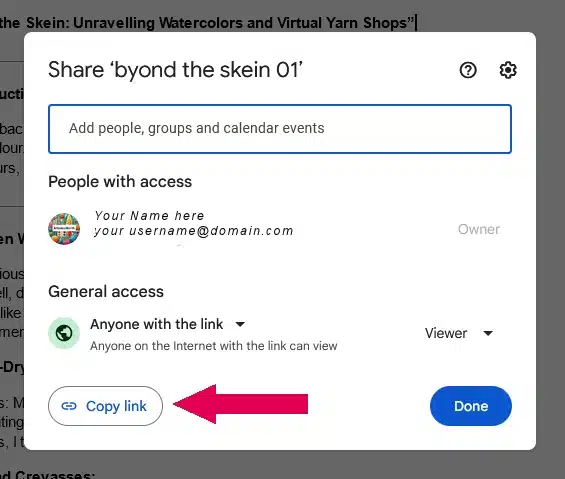
Please remember: before you can share Google Docs, spreadsheets, and other files, they need to be set to public sharing. Log into your google docs account, click on the document you want to share. You can adjust the visibility settings by clicking on the “Share” button in your Google Docs as shown by the pink arrow.

A small window will pop up. Below your name and email address you will see the “General” heading with a drop down menu below. Click on the menu and choose “Anyone with the link”. You’ve just set your document to pubic but only people with the link can see it. (This can easily be reversed by logging into google docs and using the “Share” button.
Simply click on the “Copy Link” button and then the blue “Close” button to exit this window.
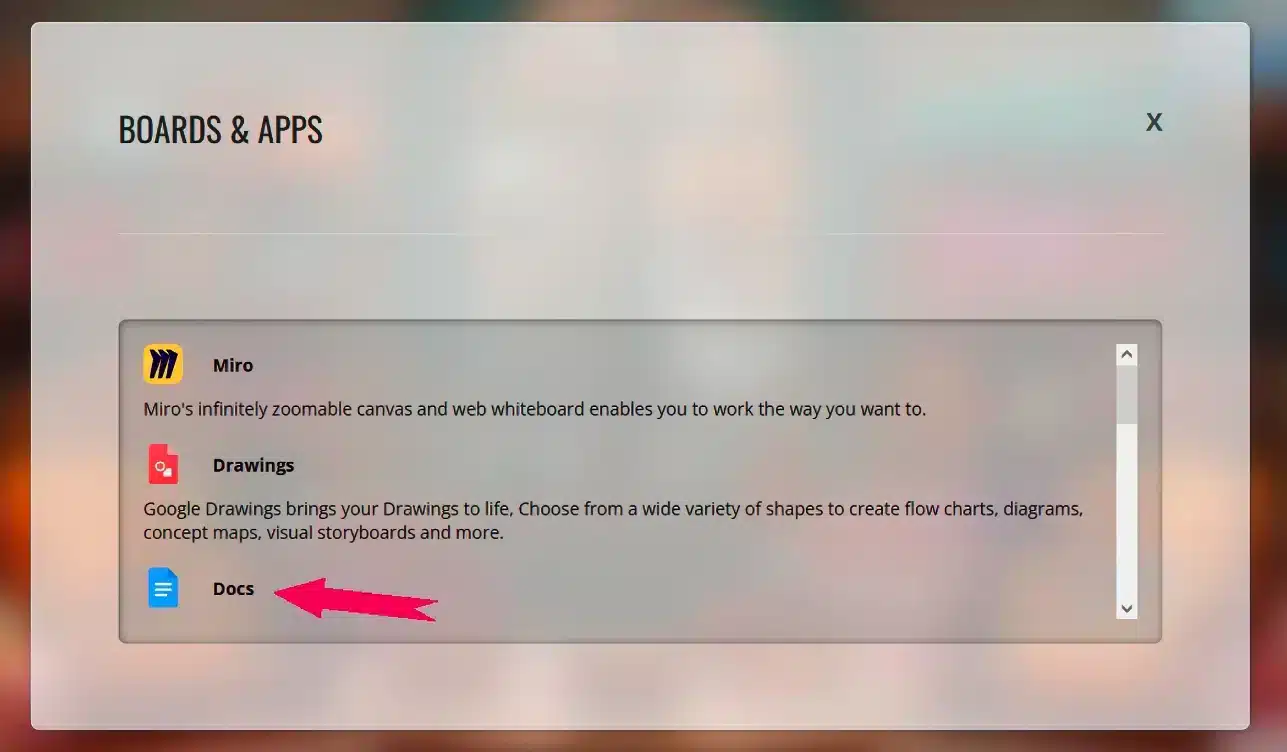
Return to the Virtual Knitgroup and click on “Docs” as indicated by the pink arrow. You can also share “Slides”, “Sheets” and “Forms”
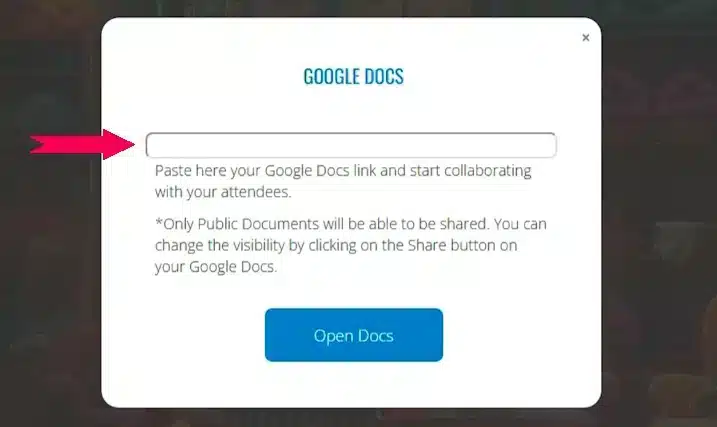
Next, insert your Google Doc link into the field marked by the pink arrow and click “Open Docs.”
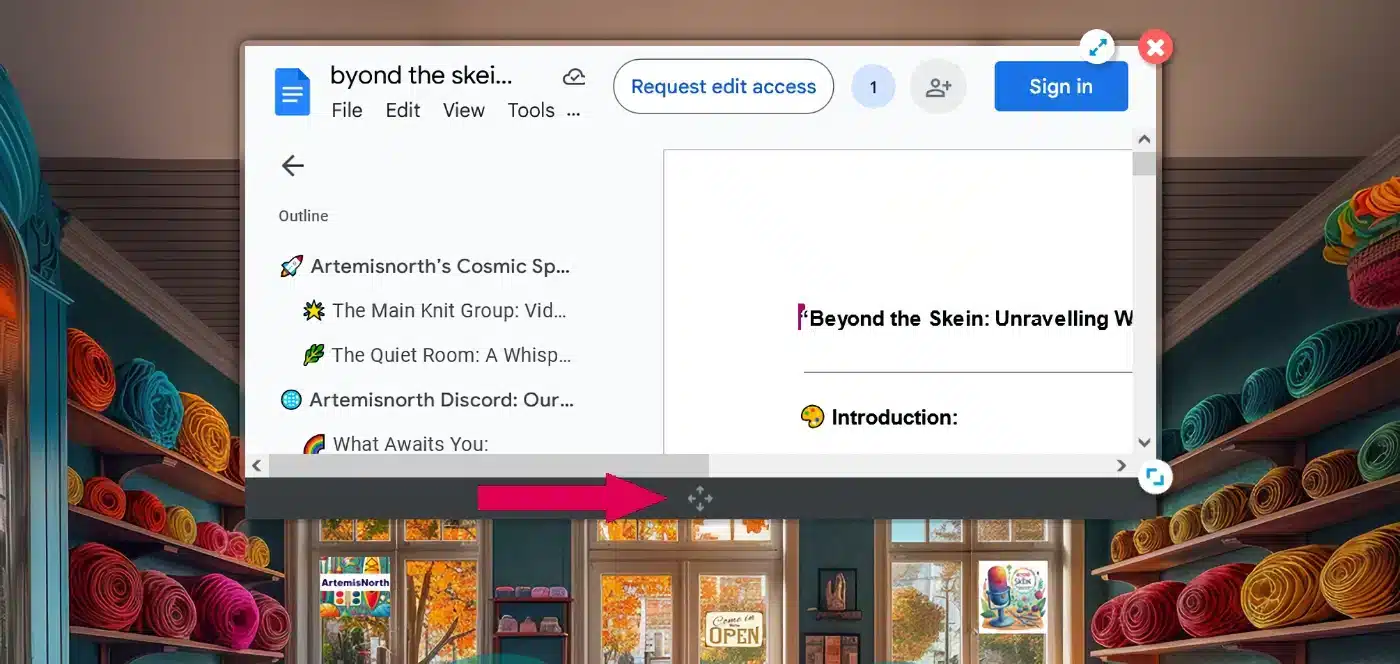
One of my favorite features when sharing documents is the ability to view them in full screen! Simply click on the double arrows marked by the pink arrow to expand the document.

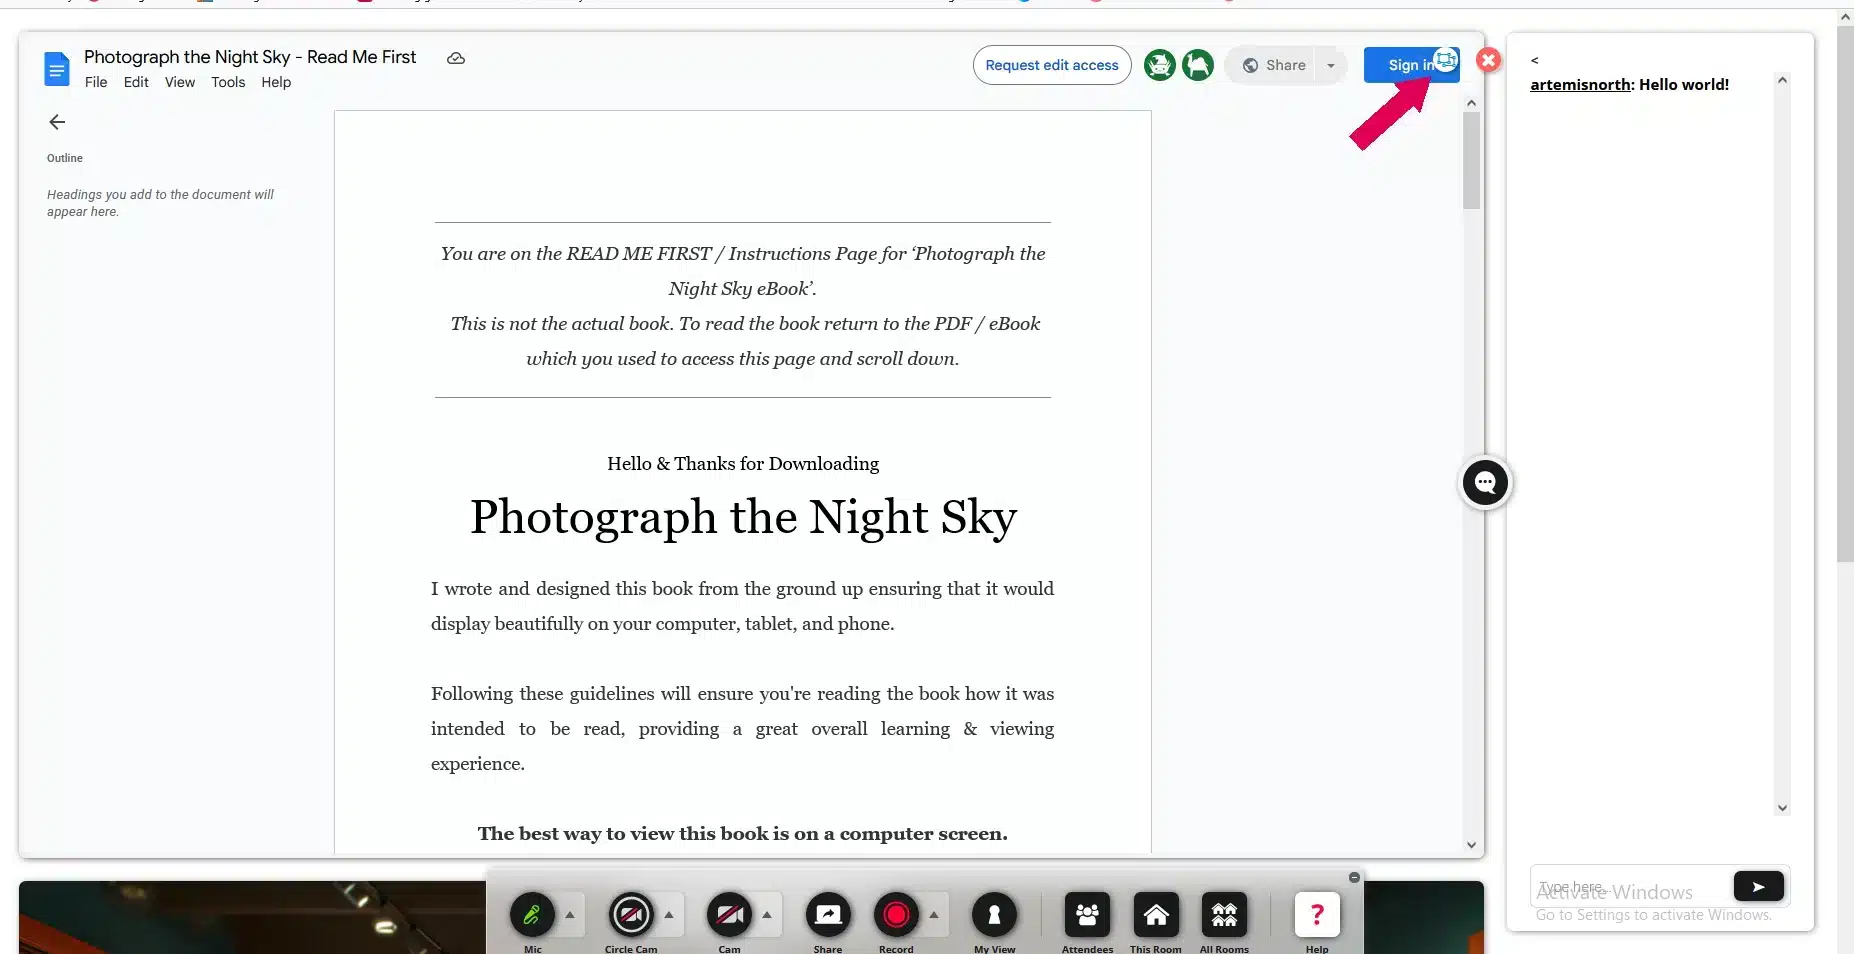
To exit full screen mode, just click on the small circle with a box inside, marked by the pink arrow, and the view will revert back to the smaller screen within the room.
To stop sharing your google doc, click on the “Share” circle to turn it off.
Sharing Websites

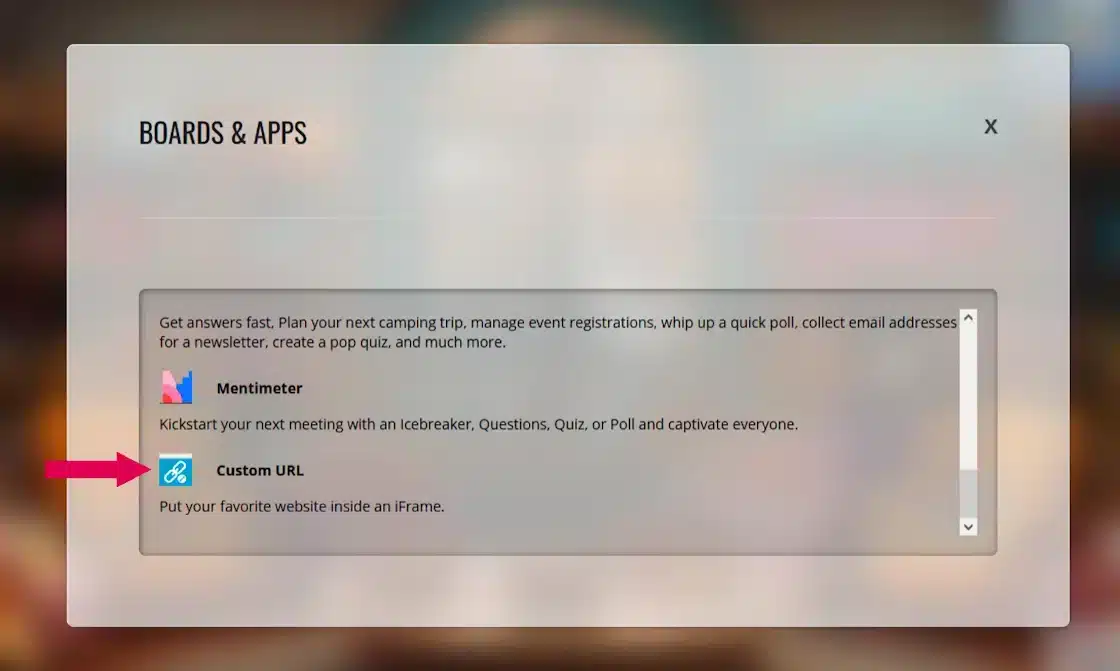
Next, scroll down a little and click on “Custom URL” as indicated by the pink arrow.
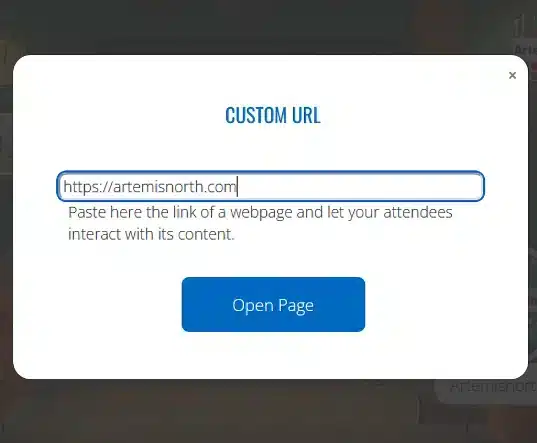
Paste or type the website URL into the box.
And there you are, sharing a fully interactive website. Have fun!
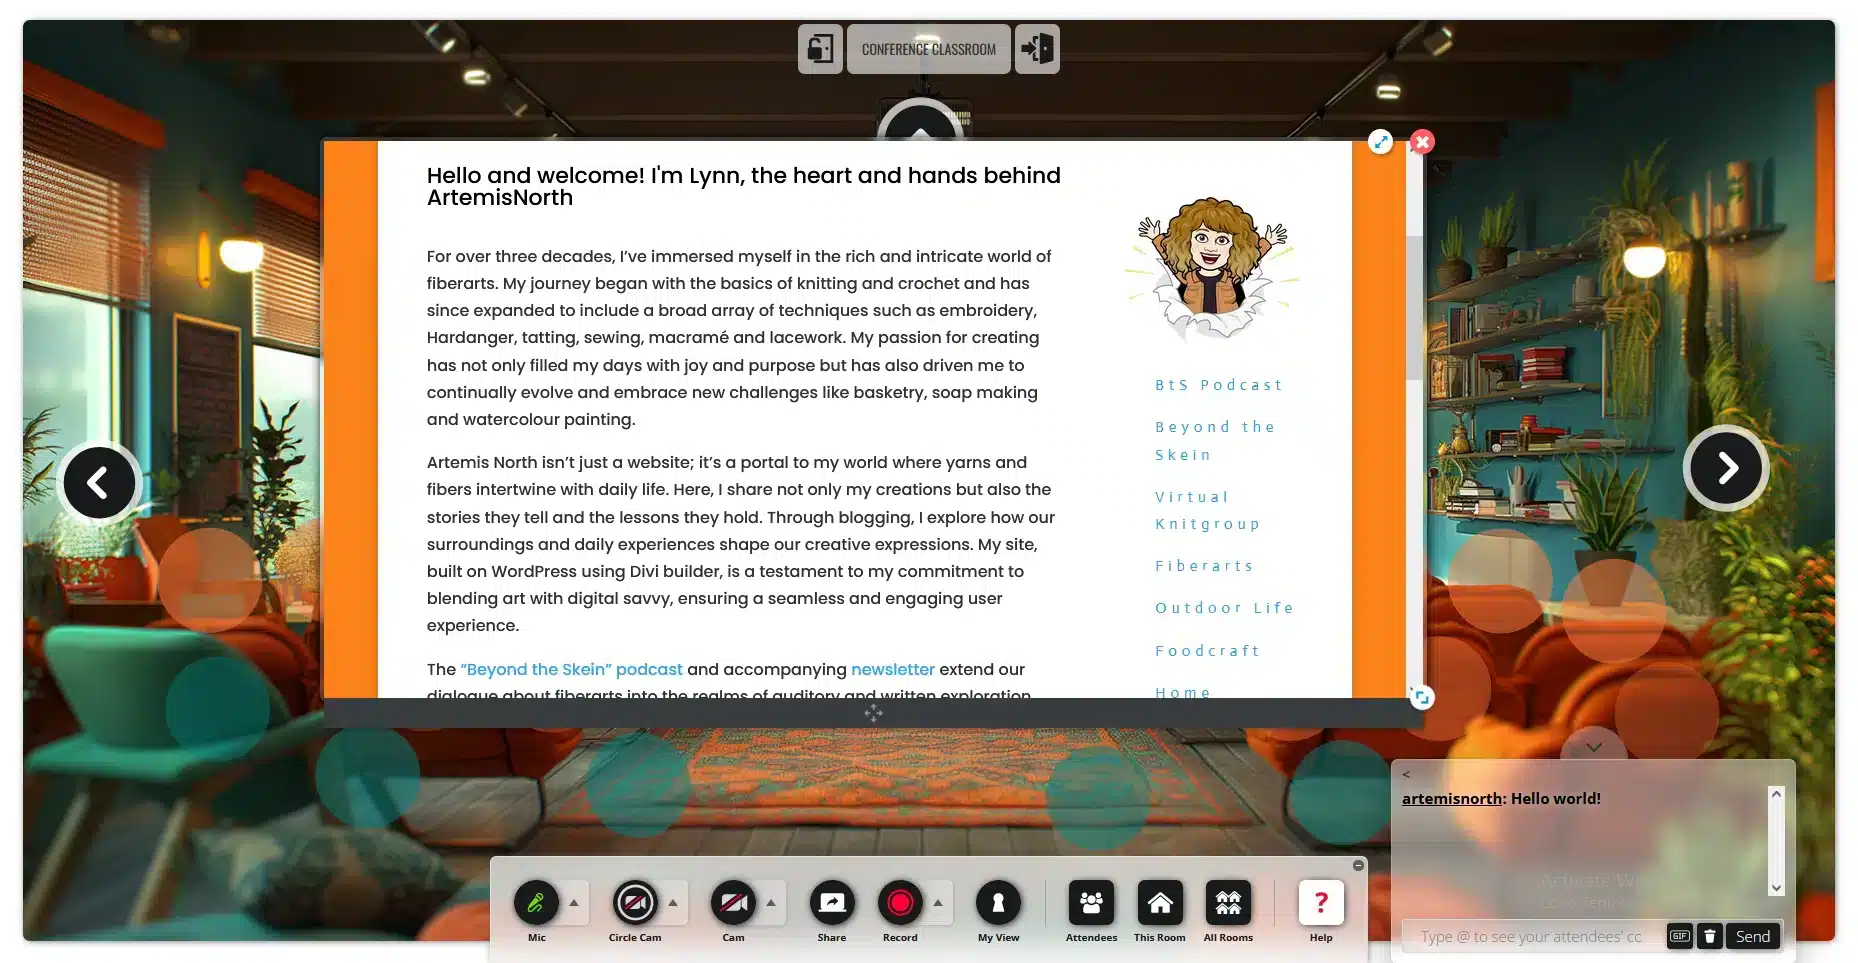
To stop sharing your website, click on the “Share” circle to turn it off or the little red “x” at the top right of the window.
Sharing Files

To share your files, just click on the “Share” circle like before. When the menu appears, select “Files,” which is shown by the pink arrow.
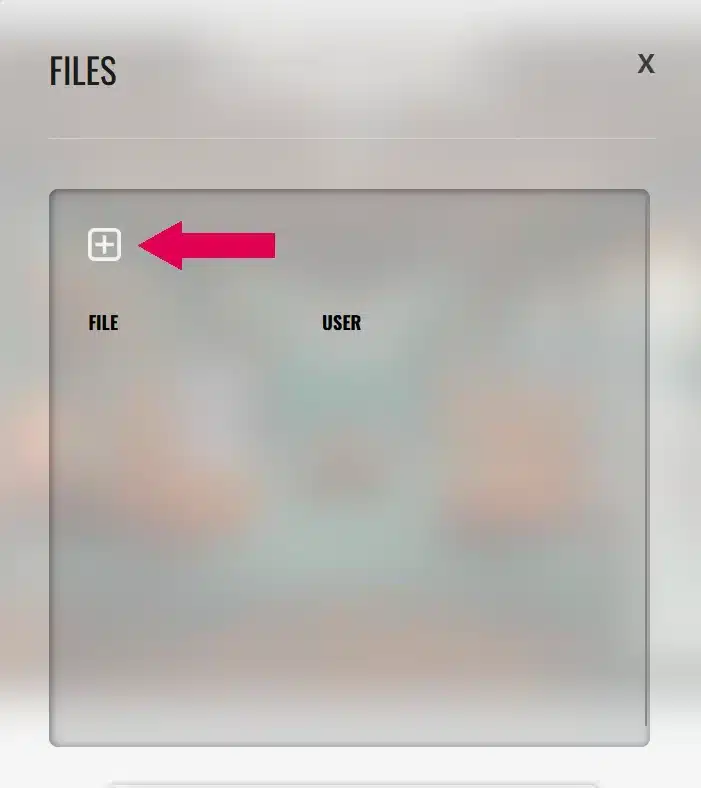
To add a file, click on the white box marked with an X, as shown by the pink arrow.
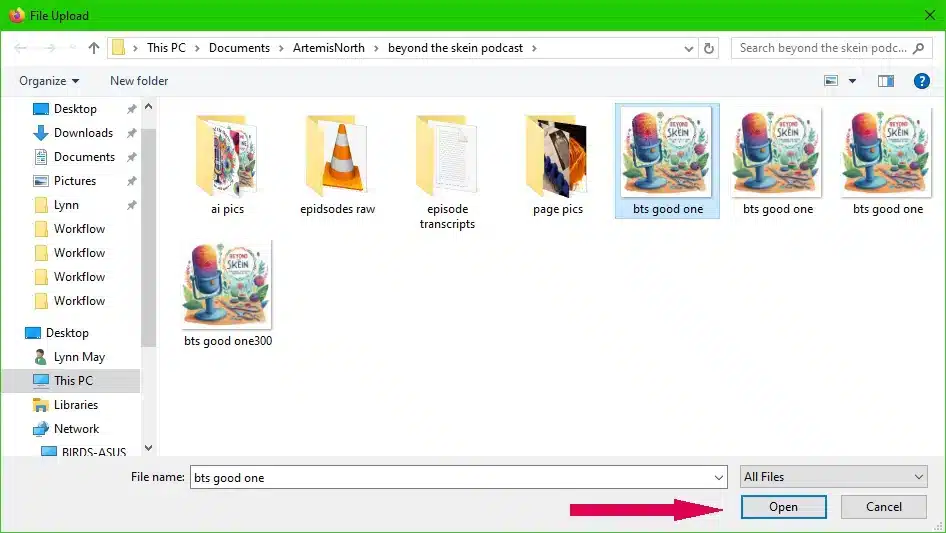
Choose which file you want to upload and click, “Open” as shown by the pink arrow.

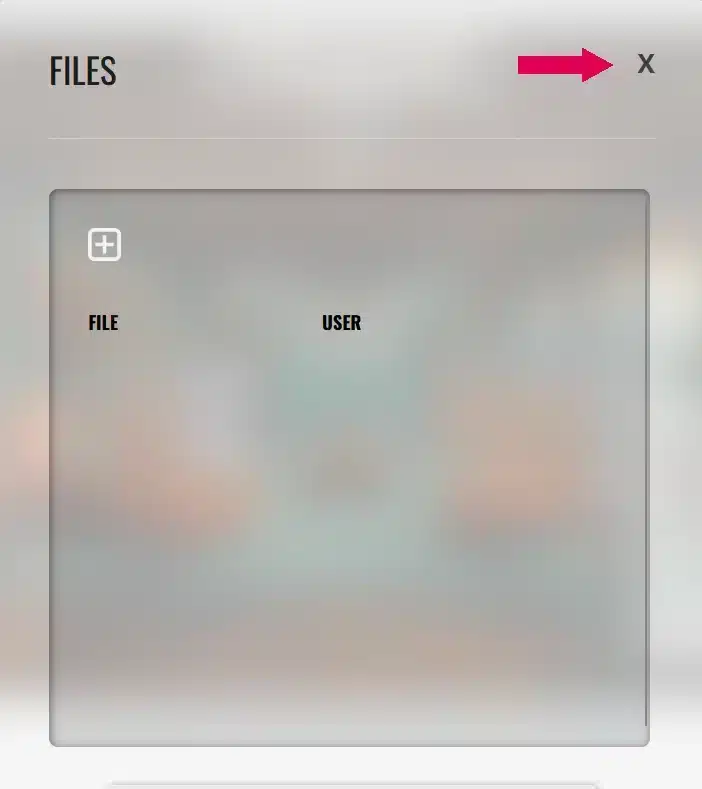
To close the file sharing window simply click the “X” at the top right of the window as shown by the pink arrow.
I think we are all going to have some fun!!
Until next time friends…

0 Comments