Let’s Make a Pad to Help Move that Heavy Mixer

I absolutely adore my Kitchen Aid mixer, but let’s be real – it’s a bit of a heavyweight. So, I came up with a nifty and affordable solution: a homemade sliding mat for the mixer. It’s super easy to make, and you can whip up a couple in no time – handy for when they need a wash!

I used a bandana from the dollar store and some old quilt batting for mine. The bandana was just what I had lying around, but you can use any fabric you like. Same goes for the batting – an old t-shirt, towel, or a piece of blanket would work just as well. It’s all about being resourceful, just like my Mom used to say, “Necessity is the mother of invention.”

I didn’t take photos when I made mine, but don’t worry, it’s really simple:

  1. Fold the edges of the bandana about a quarter inch and iron them down.
  2. Fold the bandana in half and give it another press, making sure the edges line up nicely.
  3. Cut the batting a quarter inch smaller than the folded bandana.
  4. Sandwich the batting inside the bandana and pin the edges ready for sewing.
  5. Sew along all four edges, getting as close to the edge as you can.
  6. Finally, add some quilting stitches – I hand sewed around the basic shapes, but feel free to get creative with circles, letters, or random patterns.

And there you have it, your very own mixer mat!

As you can tell my mat is well used. It gets tugged all over. I love it!

Tip:

I like to keep my mixer equipment together. It’s just easier and more efficient. Line the bowl with a clean tea towel so you don’t scratch it. Put your attachments and the loosely coiled cord inside the bowl and fold the towel in over it. Voila! Dust free and you know where it is.

Until next time friends…

Making Bread with Dad – Simple Bread Recipe

Hey everyone! I’ve noticed that some folks are a bit hesitant about making bread, thinking it’s too much effort with all that kneading and rising. But let’s talk numbers – homemade bread can cost around $1.25 compared to store-bought at $3.00. Imagine the savings over a month! Every little bit counts, right?

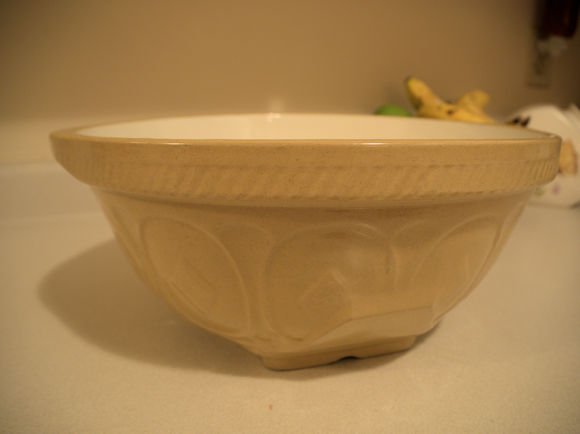
And here’s a little secret: making bread is special to me. It’s like having my Dad close by, especially when I use his old antique mixing bowl. It’s almost like getting a big hug from him! Dad was a master at bread-making, and I feel that tradition lives on every time I bake.

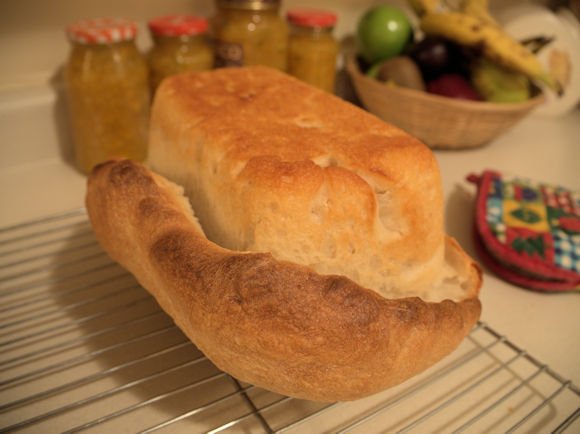
Loaf of Bread
The Old Bowl

I’m excited to share with you a simple, no-knead bread recipe that’s practically fail-proof, as long as you use good quality ingredients – they really are the key!

First things first, let’s talk about yeast. If you’ve got a packet that’s been sitting in your cupboard since forever, it’s time to say goodbye to it. Fresh yeast is essential for great bread – it doesn’t have to be fancy or expensive, just fresh. And don’t skip proofing your yeast! It’s better to test a small amount than to risk a whole batch of bread, right?

Now, here’s something you might not have thought about: your water. Yup, that’s important too! When I moved from the countryside to the city, I didn’t realize how the chlorinated and fluoridated water could affect my bread. It was messing with my yeast! If you’re unsure about your water quality, try leaving it out for 24 hours to help get rid of those chemicals. I always keep a couple of 2L jugs in my fridge, so I’m prepared, but it might mean a bit of planning for some. Trust me, it’s worth it for that perfect loaf!

Dad's Simple White Bread

A freshly baked loaf of simple bread features a crisp, golden crust and a soft, fluffy interior. Its warm, inviting aroma and homemade goodness make it the perfect comfort food. Enjoy it sliced, buttered, or as the base for your favourite sandwich.
Servings 1 loaf

Equipment

  • 1 large bowl
  • 1 medium bowl
  • 1 kitchen scale
  • 1 measuring spoon 1 tsp
  • 1 wooden spoon or sturdy spatula
  • 1 plastic wrap
  • 1 loaf pan

Ingredients
  

  • 2 cups water tepid, body temp
  • 2 tsp sugar
  • 2 tsp yeast
  • 1lb 2oz flour weighed
  • butter for pans

Instructions
 

  • Plug in your kettle. Trust me you’ll see why. In the medium bowl place 1.5 cups water and 2 tsp sugar. Stir it to dissolve the sugar. Add half a cup of boiling water. The reason you don’t want to skip this step is that yeast thrives in lukewarm water. Meaning it can’t be too hot or too cold or you will kill the yeast. Sprinkle 2 tsp yeast on top and set aside for about 10 minutes. This is proofing your yeast. When it’s ready the yeast will be bubbly.
  • Weigh your flour and place it in the large bowl. (I made two loaves) Add the salt and whisk it a bit to fluff it up.
  • Once proofed add the water and yeast mixture to the flour and stir, beat, move around until it is well mixed. You will notice it’s quite sticky. Trust me… continue on. This is different from any other way I’ve made bread before.
  • Cover with plastic wrap and set in a warm, draft free space. I like to use the oven. Set your oven to the highest heat for about one minute and then turn it off. Put your bowl in the oven. Perfect! Let rise for 1 hour or until doubled.
  • Once you have achieved the first rise you want to release some of that air. Using your wooden spoon pull the dough from the edges of the bowl and fold it in on itself. Go all the way around the bowl until you have deflated a good portion of the air pockets.
  • Butter your loaf pan or whatever vessel you choose and put the dough in. In the picture above please note…. this is too full. LOL! I wasn’t paying attention but it’s a good lesson that shows you it really doesn’t have to be perfect. As you can see I made two loaves. Because the dough is sticky it’s tricky to split the batch so just do your best. Sometimes I add a little more flour to the mix so that the second rising won’t spill over the edge of the pan.
  • Preheat the oven to 425 degree F. and place the bread somewhere close by. Let rise for about 30 minutes.
  • Once it has risen place it in the oven for 15 minutes.
  • At the 15 minute mark turn the heat down to 375 degree F. and continue cooking for 17 minutes.

Notes

Always Weigh Your Flour.
I hope you noticed that I listed the flour by weight. It’s important to note that weighing your flour gives you a much better product. Flour tends to settle and compact somewhat during shipping and handling so it’s hard to say what volume of flour is in a cup. AND once you feel comfortable with this recipe you can play around with different flours as long as you have the correct weight. I like to grind Roger’s Porridge blend in my food processor to create a flour. It’s tasty and I know it’s healthier than white flour.

As you can see it’s not perfect. LOL!! Not sure what happened…. I was probably paying too much attention to my camera and not enough to the bread. Oh well. The Run-over was yummy when I cut it off and buttered it. Nice and crispy! Sometimes it comes out as planned and sometimes it doesn’t. Either way it’s still yummy!

Let the bread completely cool before bagging it. I usually make two loaves. I leave one bagged loaf out on the counter and put the other one in the freezer. Easy as can be. I hope you enjoy making this bread.

Until next time friends…

Make Your Own Citrus Marmalade! Recipe

Hey everyone, Happy New Year! I really hope you all had a fantastic holiday season. Mine was absolutely wonderful – it felt like a classic, old-fashioned Christmas. I decided to go with handmade gifts this year, which was a bit nerve-wracking at first. I kept wondering if everyone would like them. But guess what? My worries were totally unnecessary – everyone adored their presents. Phew, crisis averted, haha!

Oh, and guess what happened early this year? A friend dropped by with a fruit basket! I absolutely love fruit, but I was a bit concerned that I wouldn’t be able to finish it all before it went bad. So, what to do? Then it hit me – Marmalade! Yes!

Just a heads up, I’m a fan of slightly bitter marmalade. I guess that’s the Brit in me, thanks to my Grandmother. She got me hooked on so many British delights – currant jam, Earl Grey tea, black currant Earl Grey tea, marmalade… the list goes on. I could keep talking about it, but I don’t want to bore you!

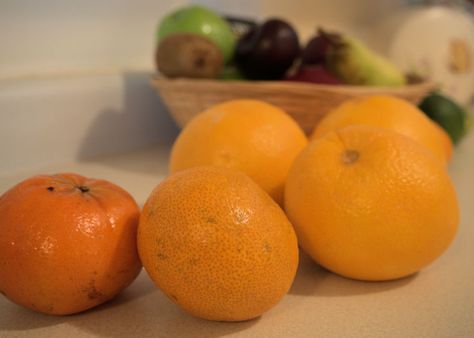
As you can see in the picture, my oranges are a mix and not exactly picture-perfect, but then again, what is? I’m using three navel oranges, one tangerine, and three clementines. Plus, I had this gorgeous lime and thought, why not include it? (So glad I did!) I’m excited to show you that making marmalade is easier than you might think.

Citrus Marmalade

This citrus marmalade recipe is a delightful blend of oranges, lemons, and limes, creating a perfect balance of sweet and tart flavors. Easy to make, this homemade marmalade is ideal for spreading on toast, pairing with cheese, or as a flavorful glaze. Enjoy the fresh, zesty taste of citrus in every jar!
Course Breakfast

Equipment

  • 1 large pot
  • 1 large spoon wooden or otherwise
  • Enough sealing jars to hold your marmalade
  • 1 Candy thermometer
  • 1 A large canning pot to process your jars (a large stock pot will work)
  • 1 Ladle
  • 1 Canning funnel
  • 1 Tongs for handling your very hot jars

Ingredients
  

  • 1 piece Citrus (orange, lemon or lime.
  • 1 tbsp water
  • 1/2 cup sugar

Instructions
 

  • Wash your fruit and process it however you choose. As I said I cut mine into chunks and use a food processor.
  • In a large pot combine your fruit, water and sugar.
  • Put the pot on a medium heat. Keep your eye on it. Once it starts to bubble reduce heat to medium low and stir frequently. Continue to simmer until the temperature reaches 220 degree F.
  • While your marmalade is simmering bring your water to a boil in the canning pot to sterilize your jars. You don’t have to use mason jars. I keep jars from jams, pickles and pasta sauces because they work well for canning.
  • Process your jars and lids for at least five minutes. You want them sterilized and hot! Remove from the pot with your tongs. BE CAREFUL! It’s easy to burn yourself. Set them up-side down on a clean tea towel to dry. Do the same with the lids.
  • Once your marmalade reaches 220 degree F ladle the hot mixture CAREFULLY into your jars leaving about a quarter inch space at the top. With a damp cloth clean the tops of the jars to make sure you’ll have a good seal. Twist the lids on loosely. By this I mean twist them finger tight. Don’t over do it.
  • Return the jars to the boiling water by setting them in upside-down. Process for 10 minutes
  • Carefully remove the jars and set them right side up on a tea towel and allow to cool for several hours. You will hear a POP when they cool enough to pull the centre of the lid down to create the seal. I love that sound!

Notes

How you cut your fruit determines the flavor:
 
-cutting up the whole fruit and processing in a food processor will give you a bitter marmalade.
-cutting the zest thinly from the fruit and discarding the pith will give you a sweeter marmalade.
Many people like to process their fruit in as many different ways. Some will use a mandolin and carefully slice it paper thin. I prefer simple methods. I cut mine into chunks and process it in a food processor. Easy and fast! So it’s entirely up to you how you slice them. I should mention at this point that you should wash your produce well before you start.

That wasn’t too hard! Now you have the ratios to make marmalade with any citrus fruit!

Until next time friends…