Stamps Are Mini Time Machines

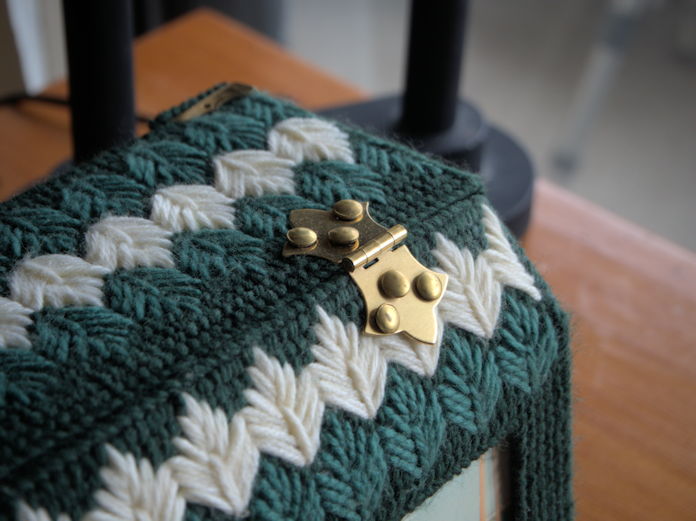
Hey everyone! I have to share this sweet story about a Christmas gift I received last year. A dear friend gifted me this really cool owl light, but, I must confess, it’s been sitting in its box all this time. Today, I finally cleared all my craft stuff off my desk, and guess what? I found the perfect spot for my new owl light!

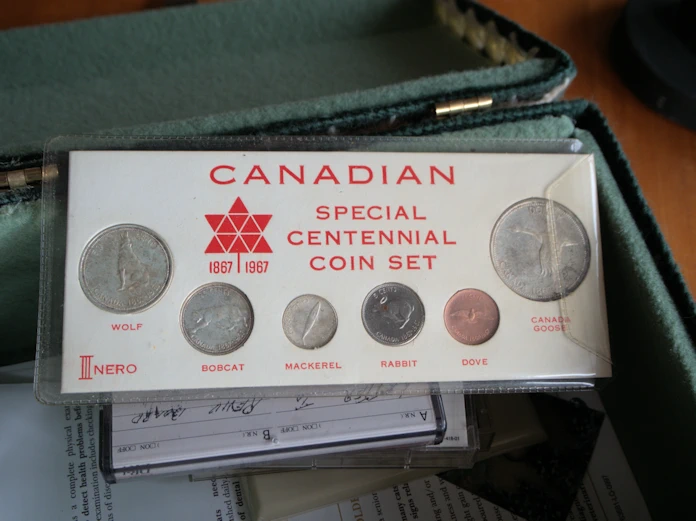
While tidying up, I stumbled upon my old stamp collection. The moment I touched the worn spine of that large blue binder, a flood of memories came rushing back. I’ve been a stamp collector since I was a kid. Back when I was 10, Mrs. M., who seemed like an “old lady” to me then, ran this super casual stamp club for us kids in the village. I absolutely adored those club meetings and hardly ever missed one. It’s amazing how certain things can instantly take you back and fill your heart with nostalgia!

Mrs. M. showed us the magic of stamp collecting. She taught us history, art, culture, and human nature using Philatelic addiction as her medium. I could “travel” the world with stamps. Every country commemorates their Nationality by showing their way of life on their stamps. Carefully looking through Mrs. M.’s albums, year by year, was like going back in time.

Every year you could see how people dressed, what they drove, what progress they’d achieved and the history they focused on. Time capsules on paper.


This is the first mint stamp I put into my collection. This stamp was created to celebrate King George V’s Silver Jubilee in 1935. The Canadian Banknote Company, LTD. produced 60,425,000 of them.

It’s not valuable, worth about 75 cents. This one is M-NH-VG which means Mint-Never Hinged-Very Good condition.

We were taught all the right ways to take care of our stamps, but, like most kids, we were more into the fun part. Pasting those stamps onto our albums with hinges was our favorite thing to do. Watching our collections grow page by page was just so exciting!

We’d all huddle up in a circle, our bags of postmarked stamps at the ready, eager to trade with each other. But before the trading frenzy began, Mrs. M would share stories about the latest stamps and their significance. We’d listen intently, not even realizing we were soaking up so much cool information. It’s funny how we learned so much without even noticing.

We all had different interests so trading time was fun. No one tried to “one up” anyone. I loved “stamps on stamps”. Don’t ask my why but it appealed to me. You’d be surprised how many countries issue this design.

Part of collecting world stamps is also translating country names. Who knew that “Magyar Posta” meant “Hungary Post”? I don’t really know much about my world stamps because my real focus was on Canadian Stamps. I may research some of them one day. Who knows, maybe sooner than later.

Hungarian stamps were always of interest to me. The details and textures on their stamps were exquisite.

Look at the stamps to the left. The camera couldn’t pick up the texture of the lace. When you run your finger gently over the surface you can feel the delicate design.

Umm Al Qiwain in Western Asia made a stamp that fascinated us. Do you remember those rectangular cards with the plastic pictures that moved when you tilted them? They produced those as stamps! My favourite one was an ocean scene with clown fish that moved. It was pretty neat.

One night, sitting at the kitchen table, my Dad produced a softcover stamp album and proceeded to explore it with me. I was in awe! This was his collection and he had mint stamps from various countries during W.W.II! Then he surprised me. He gave it to me with some strings attached of course. I was just a kid.

I think it was around that time that my parents bought me two stamp albums, a World Album and a Canadian Album. I was over the moon! It took me days to carefully transfer my stamps into the albums and I still don’t care for the taste of stamp hinges. LOL! I don’t know if I ever concentrated on anything the way I did that collection. Stamp Club and collecting took on a new lustre after that.

That year @shadowspub bought me a set of First Day Covers of the Canadian Provincial Flags for my birthday. It’s a beautiful set. Each envelope has beautiful pictures and information about the province. And, of course, the stamp of the provincial flag.

The above stamps are part of a set of 12 called, “What Christmas Means to Me”. They were printed in 1970 which was International Education Year in Canada.

Children from across Canada entered their drawings into the competition. The winners not only had the prestige of seeing their art on Canadian postage but they were also given a free trip to Ottawa, our Nation’s Capital.

One of my most cherished memories from stamp club was when we put together our very own stamp show. We spent weeks organizing, trading, and creating our displays on bristol board, complete with little notes about each stamp and splashes of colour from markers. My display was “Stamps on Stamps”, but there were all sorts like “Masterpieces on Stamps”, “Horses on Stamps”, and “Transportation on Stamps”.

The day of the show was special – we all dressed up and learned how to make these adorable tea sandwiches. There were checker-board patterns, watercress with cucumber rounds, and cream cheese mixed with salmon. It felt so fancy and grown-up! We brewed a proper pot of tea, set out the china and silver, and welcomed our guests like little pros. For a 10-year-old, it was like a dream come true!

Mrs. M., our quirky and sometimes stern guide, was truly wonderful. She shared her love of philately with us, a bunch of small-town kids looking for something interesting to do. I often think back and hope I thanked her enough before stamp club ended. She really opened up a world for me that I still treasure today. Maybe one day, I’ll pass this passion on to my grandson?

These days, I don’t buy stamps regularly, but I keep up with the Canadian Philatelic Society publication. I love adding special stamps to my collection, like the 100th Anniversary of the Titanic sinking or Star Trek stamps. And whenever I receive letters from abroad, I add those stamps too. I don’t think I’ll ever stop collecting.

So, what about you? Do you have any collections? I’d love to hear about them!

Until next time friends…

Easy Peasy Chicken Schnitzel – Recipe

Hey everyone! Do you ever have those evenings where you just crave some good old comfort food? Something that takes you back to your childhood and those carefree days? I remember when I was young, my friend’s mom used to make the most amazing schnitzel. I wasn’t a big fan of the cabbage and dough noodles that came with it, but I always looked forward to dinner at her house.

Fast forward a few years, and I learned how to whip up schnitzel for my own kids. It’s surprisingly easy to make and so versatile. Feeling Italian? Just add some marinara sauce and a sprinkle of Parmesan. Get creative with it! My personal favourite is to top it with sautéed mushrooms, a bit of steamed spinach, a dash of nutmeg, and a squeeze of lemon juice. It’s simply delicious!

Chicken Schnitzel

This Chicken Schnitzel recipe features tender chicken breasts coated in a crispy, golden breadcrumb crust. The chicken is first pounded thin, then dredged in seasoned flour, dipped in beaten eggs, and finally coated with breadcrumbs before being fried to perfection. Serve this delicious schnitzel with a lemon wedge and a side of your choice for a satisfying meal.
Servings 2 servings

Ingredients
  

  • 2 breasts chicken skinless, boneless
  • 1 cup flour
  • 1 cup breadcrumbs
  • 2 eggs
  • 1 tsp paprika
  • 1 tsp oregano
  • 1 tsp thyme
  • 1 tsp garlic powdered
  • 1 tsp salt
  • 2 tbsp butter
  • 2 tbsp oil I like olive oil

Instructions
 

  • Prepare to coat the chicken: Place flour on one dinner plate and breadcrumbs on another. Mix the spices with either the flour or the breadcrumbs. Crack two eggs into a pie plate and beat them roughly. Arrange the plates near the stove in this order: flour, eggs, and breadcrumbs for efficiency.
  • Pound the chicken: If storing chicken breasts in individual zip-lock bags, leave the chicken in the bag and pound it with a tenderizer until about a half inch thick. Alternatively, you can use two pieces of plastic wrap.
  • Preheat the oven: Heat your oven to 200 F to keep the cooked schnitzels warm while frying the rest.
  • Coat the chicken in flour: Place the chicken flat on the flour plate, ensuring it's completely coated on both sides. Shake off any excess flour.
  • Dip in egg: Transfer the floured chicken to the egg plate, coating it thoroughly on both sides. Gently shake off any excess egg.
  • Coat in breadcrumbs: Move the chicken to the breadcrumbs plate, covering the entire surface. Turn it over and press breadcrumbs into all the nooks and crannies.
  • Fry the schnitzel: Place the breaded chicken in a hot frying pan. Cook for 4 to 5 minutes on each side until golden brown and springy to the touch.
  • Keep warm in the oven: Once cooked, transfer the schnitzel to the preheated oven along with any potatoes or sides you're preparing.
  • Repeat the process: Bread and fry the next chicken piece following the same steps.

That’s all there is to it! Plate up and enjoy.

Don’t feel too guilty about the fat content. You may have noticed that the entire meal was cooked using the same butter and oil. After I was finished cooking there was about two tablespoons of it left in the pan. I probably wouldn’t eat this meal every night but once or twice a month makes it guilt free to me!

Do You Want to Become a Ham Radio Operator?

I’ve recently been asked to write some instructional posts about how to become a Ham Radio or Amateur Radio Operator so let’s start off with what a Ham Operator is:

According to Wikipedia:

An amateur radio operator is someone who uses equipment at an amateur radio station to engage in two-way personal communications with other amateur operators on radio frequencies assigned to the amateur radio service. Amateur radio operators have been granted an amateur radio license by a governmental regulatory authority after passing an examination on applicable regulations, electronics, radio theory, and radio operation. As a component of their license, amateur radio operators are assigned a call sign that they use to identify themselves during communication. There are about three million amateur radio operators worldwide.[1]

Well, that sounds quite boring. Snore. Becoming a Ham was an exciting time in my life. My husband and I had opened an electronics repair shop which catered to Truckers. We fixed pretty much any electronic devices they had in their cabs but we focused mainly on two-way radio repair. I knew only basic electronics when we opened the shop, such as reading schematics, using a multi-meter and being able to fix simple electronics problems in my home.

My husband and I worked in close quarters, an 11’ by 24’ job site trailer, and I’m telling you that man is patient. He is also an excellent teacher! He taught me more than I thought myself capable of and it was amazing. Before long I was a very capable radio technician and the drivers began to trust my work. My focus was mainly on C.B. or Citizen’s Band radios… or “children’s band” or “Sesame Street band”. C.B. radios require no licensing and it shows. Some operators’ behaviour could be pretty outlandish but it could also be a lot of fun

C.B. radios run on the 11-meter band or 26.965 M to 27.405 M. (M = megahertz) What the heck does that mean? Radio is all about the length of the distance from the peak of one wave to the peak of the next wave, or wave tip to wave tip. The waves being electromagnetic waves, that range from radio waves all the way up through microwaves, x-rays and all the way up to light waves, infra-red and ultraviolet.

So C.B. radio is 11 meters from peak to peak hence it’s the 11 meter band. If you take the speed of light and divide that by 11 meters you get 27 M roughly, the speed of light being 299792458mps (meters per second).

We had quite a radio set-up. I was running an RCI 2970 at my bench which was connected to an Antron 99 antenna on a 40-foot T.V. tower. You could hear me for miles. It was a nice clean signal. (At this point I could get lost down a rabbit hole explaining why a clean signal is important but I’ll cover that in another post.) It was part of our marketing ploy to have me “man” the radio when drivers called in. I loved it!
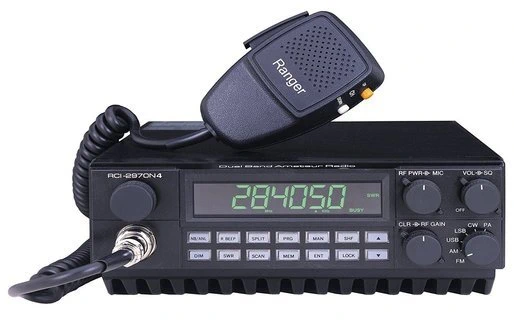
When we bought this old girl she wasn’t working very well so I fixed her! Yup!! It was just some cold solder joints, which means the solder had broken and just needed to be redone. The hardest trick was finding it. After re-aligning the whole radio she worked beautifully.

Also on my bench was a sweet little rig, a Yaseau FT-90R, VHF/UHF Dual Band FM Transceiver. It was a conspiracy to entice me into getting my Ham license. I came into the shop one day to find this awesome little rig all installed and glowing blue on my bench. My husband had his similar rig installed in our car and I enjoyed listening to him talking on it. He sounded so official using his call sign and QR codes and stuff. LOL!
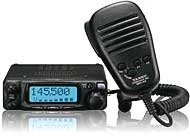
One of our regular customers traded my husband’s tech work for the radio. It was a done deal and I was quite excited. I called our supplier, asked him to add an ARRL Handbook to our order and began studying for my exam.

I refer to my copy of the A.R.R.L. Handbook as my “Ham Bible” because it is the definitive guide to almost every topic regarding Ham Radio that a newbie would need. I’ll never forget building my first antenna using this book for reference. It was my first major accomplishment.

Here in Canada, we have a national association called R.A.C., Radio Amateurs of Canada which is an excellent source of information. You can enroll in an online class or purchase your study guides. If you prefer a classroom setting find out if there is a Ham Radio Club in your area and join it. They almost always offer classes.

Once you’ve earned your Amateur Radio call sign it’s yours for LIFE!! I will always be VE3LYY.

Even though I’m Canadian I highly recommend getting your hands on a copy of the A.R.R.L Handbook. It really doesn’t matter if it’s the most recent one. You can find them on E-bay or Amazon or maybe through a local Ham Club. A.R.R.L. or American Radio Relay League is the American equivalent of R.A.C and their website is another valuable source of information.

A word of caution: if you do have Ham equipment please ignore the impulse to key-up without a license. Airlines, emergency services and the military use these radios and the last thing you want to do is accidentally interfere with their operations. You will be heavily fined and possibly imprisoned.

Everyone has their own motivation for becoming a licensed Ham but when it comes down to it when the SHTF Ham Radio Operators are our first line of defence.

Over the years through our local radio club, L.A.R.C. (London and Area Radio Club) I’ve been involved in a search for a missing child (this turned out positive and the child was found safe and sound.), I’ve been part of the CANWARN team which monitors crazy weather and reports in and various other activities like patrolling London on Devil’s Night. Being a member of a Ham Community is never dull and I’m always learning new things.

Until next time friends…

Quick & Easy Chicken Mushroom Pasta – Recipe

Hey everyone! You know when you need a meal that’s quick, easy, and delicious? That’s when I turn to my trusty all-in-one pot pasta meal! It’s funny, I’ve been making this for years, and now it’s suddenly the latest trend – makes me chuckle every time!

Just a couple of nights ago, I roasted a super tasty chicken and made some broth from the leftovers. Tonight, I’m whipping up another speedy dinner. It’s all cooked in just one pot and takes about 30 minutes from start to finish. The best part? This recipe is super versatile. You can toss in any leftovers you’ve got or whatever you’re in the mood for. It’s a lifesaver on those busy evenings!

Quick & Easy Chicken Mushroom Spinach Pasta

This Quick & Easy Chicken Mushroom Spinach Pasta is a delicious, one-pot meal that combines tender chicken, savoury mushrooms, and fresh spinach with pasta in a light, creamy sauce. It's a perfect dish for a fast, flavorful, and satisfying dinner.
Servings 4 servings

Equipment

  • 1 large pot I use a 5 quart

Ingredients
  

  • 1 tbsp olive oil
  • 1 tbsp butter
  • 2 cloves garlic minced
  • half medium onion diced
  • 1 medium carrot cubed
  • 1 lb pasta (your choice)
  • 5 or 6 mushrooms sliced
  • 1 breast of roast chicken (or raw or rotisserie)
  • 1 tsp oregano dried
  • 5 leaves fresh sage (or 1/2 tsp dried)
  • 2 hand fulls fresh spinach
  • 3 cups chicken broth
  • 1 tbsp all purpose flour

Instructions
 

  • Fill the pot and cook your pasta according to the box instructions, drain and set aside.
  • Heat your pot until a drop of water dances (not sizzles) around the pot. Add the olive oil and butter. Put your chicken breast in the pot and give it a 2 or 3 minute sear, or until you see nice brown. Remove and set aside.
  • Add the sliced mushrooms to the pot, careful not to crowd them. (Do in two batches if necessary) When you see moisture on the mushrooms it's time to turn them over. Once they have a nice brown remove them and set aside.
  • Add the onion, garlic, carrot, sage and oregano to the pot and saute until the onions are tender.
  • Sprinkle the flour over the veggies and mix. Let them cook a minute or two to cook the "floury" taste out.
  • Add the broth one cup at a time until it has thickened to your preference.
  • Slice or dice and return the chicken and mushrooms to the pot and mix.
  • Add the spinach on top and put on the lid. Let this wilt for about 2 minutes.
  • Remove the lid, gently stir in your pasta to reheat it and serve.

Notes

You'll notice I didn't add salt. If you're using commercial broth it's plenty salty. If not add salt to your own taste.
So there you have a guide to a One Pot pasta meal. Don’t be afraid to mix and match ingredients. The carrots I used tonight were leftover roasted carrots from the Roast Chicken. This meal is yummy with beans instead of meat or you can use just vegetables. Whatever you enjoy.

Serve it topped with some Parmesan cheese or a nice cheddar or just salt and pepper. It’s up to you. Enjoy!

Until next time friends…

It Really is All About Community

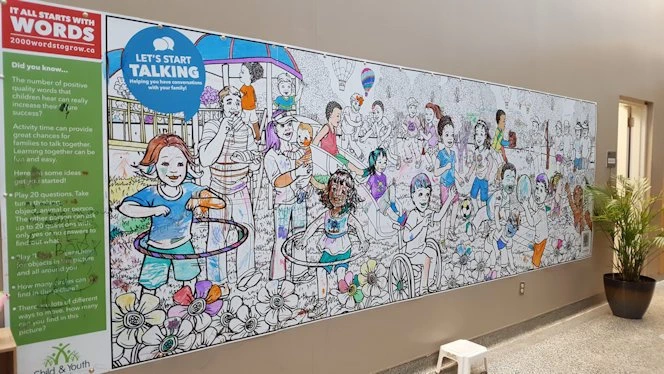
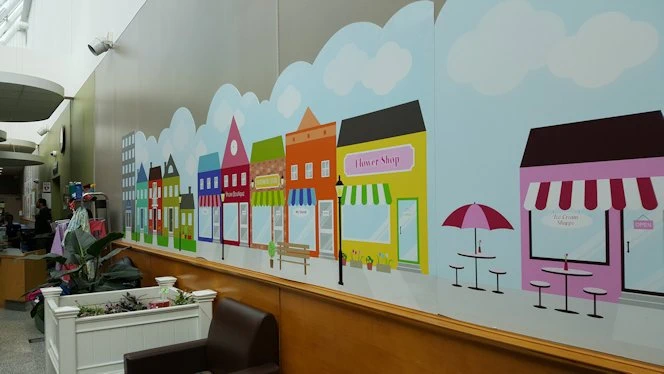
When I found out that a “Call to Arms” had been sent throughout @thealliance family I wasn’t really sure how to contribute, at first. I mean I knew I could write any post and donate the proceeds to @youareHOPE but I really wanted to focus on something to do with community. The funny thing is I was sitting in Carling Heights Optimist Community centre while I was pondering this. LOL!! Finally, while walking down the hall towards the pool I started really looking around. “How could I have missed all this?”


A whiteboard for everyone to enjoy colouring!!


A community painted on the wall


The Community built Fairy Gardens!

My husband and I are here once or twice a week yet I’ve not really noticed the small things that make it a family-focused community centre.

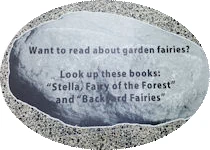
A community member built pretty boxes to plant fairy gardens then engaged the Day Camp children to use their imaginations and plant the gardens. Adorable! There are several Rock stickers on the hall floor with fun things to do relating to the fairy gardens.


There are many floor stickers in both the main lobby, where many tables are set up to sit and play cards or whatever while you’re waiting for activities, and the hall to the pool. They are so fun! I can imagine bored little ones playing along. There’s even a sticker of a log and several activity stickers around it for playing games. It’s actually quite ingenious!

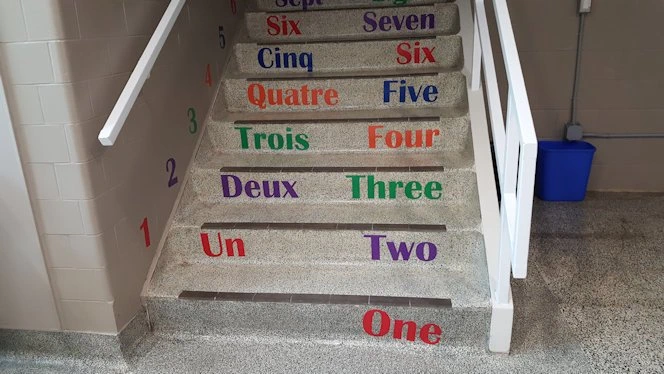
Even the stairs leading up to the pool viewing area have activities to occupy young minds!

The Carling Heights Community Centre was originally built as the community centre for the Canadian Forces Base locally known as “Wolseley Barracks”. The land was sold to the city at some point, possibly during the 80’s, but I learned that via word of mouth so I’m not sure. According to my “Army Bratt” friend, who grew up in a military family, the centre hasn’t changed much over the years.

The Carling Heights Optimist Community Centre has most of the amenities you would ever need but my husband and I only use the pool. I am thinking about taking a Tai Chi class this winter, something I’ve always wanted to do.

If you are interested in the Community Centre here’s their website. If you’d like to look a little further here’s a good site about the Carling Community and if you are interested in the history of the Canadian Forces Base this site is a good start.

So get out into your Community and start looking around! I bet you’ll be surprised what you find!

Until next time friends…